Pumpkin Carving Tool
This page describes how to make my tool for carving pumpkins into jack-o-lanterns and other artwork. Pumpkin Masters makes a similar tool. I've greatly enjoyed the Pumpkin Masters carving tools as well as their wonderful designs, but felt that their tool just was not precise enough for how I work or what I wanted to carve. The Pumpkin Masters tool also seems prone to breaking easily and does not handle delicate carving very well. My tool carves well and lets you carve corners and sharp turns quickly. Perhaps this is a case of not being a Jedi until you can build your own lightsaber.
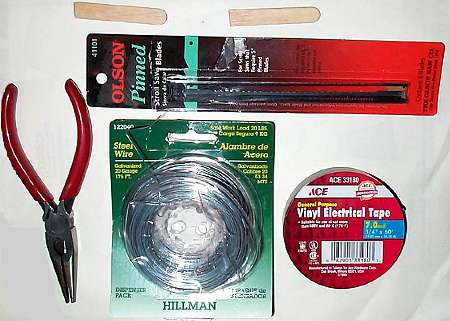
Materials needed:
- One popsicle stick, split in half
- Pack of scroll saw blades, pinned ends
- Roll of black electrical tape
- Fine metal wire (such as fence wire)
Tools needed:
- Needle nose pliers
- Scissors/knife to cut tape and stick (optional)
- Pushpin or small nail (optional)
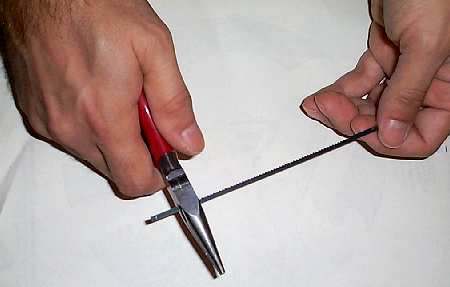
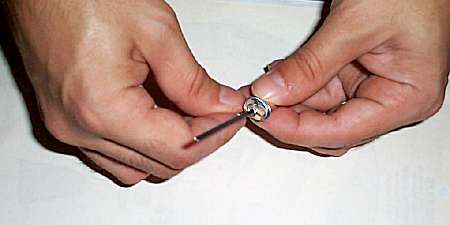
Step 1 Cut the pin off the pointed end of a blade.
Be sure to cut it off the end with the teeth pointing outward. This allows the tool to carve as you push it into the pumpkin.
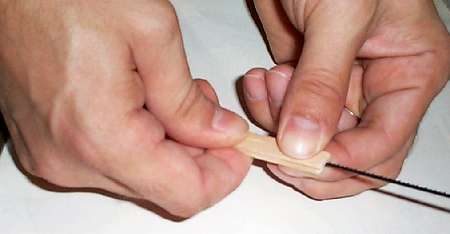
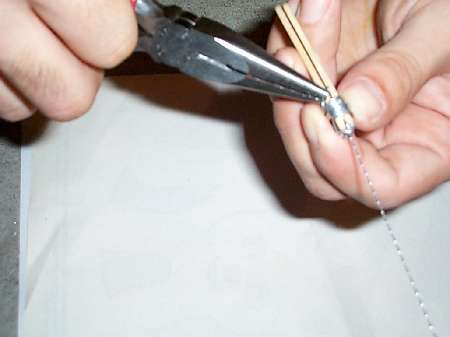
Step 2 Push the pinned end into the first half of the popsicle stick.
It may be helpful to use the pliers to squeeze it in or to "pre-drill" a hole for the pin. You could use a pushpin to make the hole. It should not go all the way through the stick. The round end should be away from the saw blade.

Step 3 Add the second half of the stick.
You'll want to push the pin into the stick much like you did in step 2. Pre-align this half to make sure the sticks match up well.
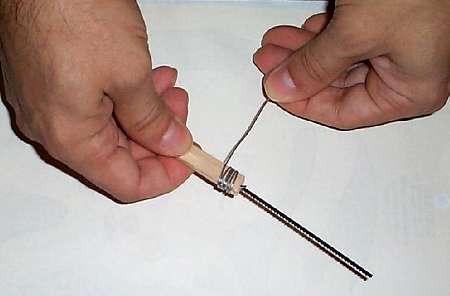
Step 4 Add the wire.
The wire is what holds the sticks together and keeps the blade in place. You want to wrap up and around the blade from each direction so that it will not wiggle in use. The pins embedded in the stick help keep the blade in place as well.
Step 5 Tuck in the wire.
When you've got a reasonably tight wrapping of wire that is holding the blade and sticks in place, you can cut off the excess wire and tuck it back into the wrapping. This keeps it from poking you.
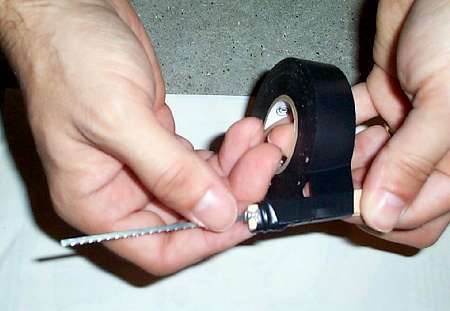
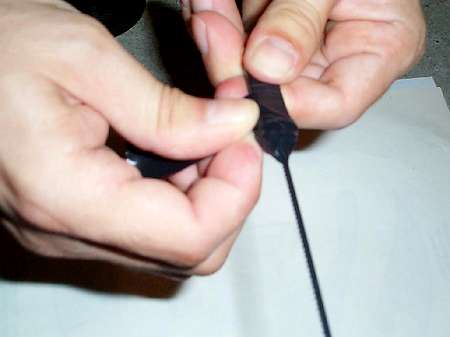
Step 6 Add electrical tape.
Although you could start using the tool after step 5 above, I find it more comfortable and stable if you wrap the stick and wires in electrical tape. This gives a nice grip and a minor amount of padding. Take your time and make it look nice. You'll want to wrap up around the blade, too.
Finished!
